A large percentage of 6 wheelers utilized the Borg Warner / Skid Steer T20 transmission. While they are virtually indestructible when properly maintained many of these skid steer transmissions have been around for over 30 years. It is only natural that at some point in their life whether it is due to improper maintenance or old age, they will need new seals, bands, drums, o-rings, or bearings.
This article will walk you through a tear-down and rebuild from start to finish of the T20 including the installation of a seal kit from Recreative Industries that includes new seals, thrust washers, and o-rings. It will also show how to install new bearings in the T20 while you are in there. All of the parts that you need to rebuild your T20 can be purchased directly from Recreative Industries. Give them a call 1-800-255-2511.
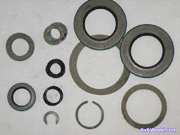
Here is a picture of the seal kit. Not shown are the main housing gaskets that are also included and the two bearings which must be purchased separately.
While this article is lengthy, the process (and transmission itself) is very simple. Not only is the rebuild rewarding it also allows you to view the inner workings of the transmission to better grasp how power is applied to the wheels. The T20 used in this article is from a late 90’s Max II. While there are several variations of the T20, the basic steps still apply.
Before you begin if you would like to view the T20 manual you can find it in our literature section or just follow this link: T20 Skid Steer Manual. It has a factory recommended procedure for rebuilding the transmission if you would like to follow that instead.
If you haven’t already, remove the transmission from the six wheeler and we will start from there. If you need help getting the T20 out of your 6x6, you can read the article on Removing the Skid Steer T20 right here in our How-To articles section.
Let’s Begin:
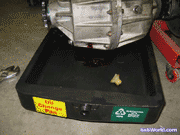
Drain the fluid from the T20
If you haven’t already, remove the bolt that holds the clutch to the T20.
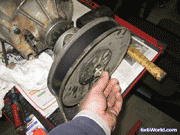
Remove the clutch from the input shaft. This is a keyed shaft so you may have to use a screwdriver to pry it off.

Pry the hair pin clips out of the brake levers (U channel).
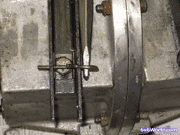
Remove the bolts and the washers that lock them into place.
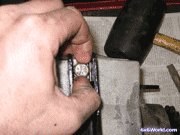
Now you can remove the brake levers.
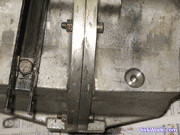
Remove the 9 hex head screws that hold the two housings together. These take a 1/4" allen wrench.
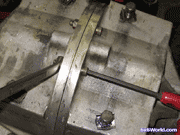
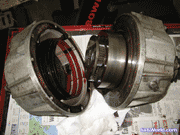
Once the bolts are removed you can pull the two halves of the transmission apart. If it doesn’t immediately want to come apart, you may have to gently tap one side with a rubber mallet to get them to break loose. You really want to be careful when you pull them apart so that the drums, gears, etc. don’t fall out. In the following picture you can see that I made a mistake and the drum came out separate from the housing. Luckily the planet gears and carrier plate stayed on.

Tip: If you set the T20 on its right side you can pull the left side straight up and not have to worry about losing any parts. The left side drums, gears, etc. will be held in place by the center housing plate.
Now that the transmission is in two parts we will start working on the right side of the transmission without the center housing plate or input shaft.


 Sections
 Recent Forum Posts


 Currently Active Users
 Latest Poll
Good info for all.
Good info for all.
Noel Woods 10-30-2024, 01:01 PM