To remove the caliper you need to remove the transmission and the transmission cradle. When the transmission cradle is out you can see the calipers are attached with pins.
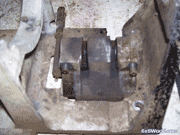
Here is a picture of underside the cradle showing the pins the caliper is attached with.
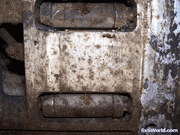
You will see some 2- 3/16" allen plug screws on both side. The right plug is removed and the pin is pulled out some.
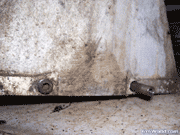
When the allen plugs are removed there are caliper pins that just slide in and out behind them. Sometimes the pins will just fall out or they can be stubborn. If its not coming out easy they are threaded on the end so you can thread in a small bolt to help pull them out. Sometimes you need to get creative with a crow bar under the bolt head to help pull. It may also help to spin the pin near the caliper with needle nose plier. Once they are out the caliper is free.
There are 4- 3/16" allen bolts that hold the calipers 3 body pieces together. 2 on each side. Remove all 4 and pull the caliper apart. You will see the brake pucks(Pads) and the puck adjusters.
Note: The brake pucks were already removed in all the pictures.
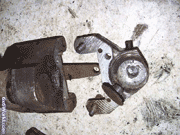
The control arm should fall from the bottom once the caliper is removed but it is probably also stuck and gunked up with old grease. Pull it out with pliers while turning it back and forth. Inside there is a piston that moves the pads in the center body. It is controled with that arm. It should slide out either side. You can see it inside the hole in the picture.
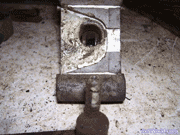
Once everything is apart, clean all the old grease and corrosion/rust off. I had to put the caliper pins in a drill and sanded them down with care. I used PB blaster as a cleaner to remove the gunk. WD40 works good too. Had to scrap under the puck adjuster where it corroded. Some hand sanding on some parts. There are some oil holes in the center body. I hand pushed/spun a 5/64th drill bit in them to clean them out. Remember they are there when its back and running.
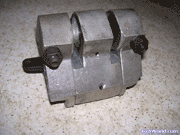
 You can see 2 of the 3 holes in the bottom finished picture below.
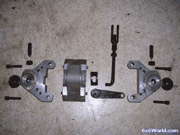
Once everything is cleaned, put it back together. Put it back in the machine and enjoy easy non-sticky driving.



 Sections
 Recent Forum Posts


 Currently Active Users
 Latest Poll
Good info for all.
Good info for all.
Noel Woods 10-30-2024, 01:01 PM